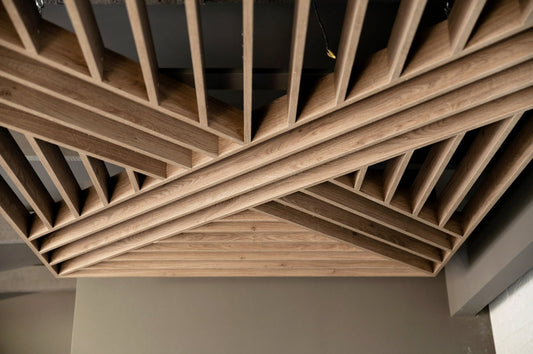
How to Plan Lighting for a Beamed Ceiling
Key Takeaways
- Beams break the ceiling into bays, and each bay becomes its own small room as far as light is concerned.
- Centering a fixture in every bay matters more than holding a rigid grid — the eye reads the repeated relationship instantly.
- Grazing light along a beam face is what makes texture visible; light hitting it straight on flattens it completely.
- Fixed points win. Plan the island and dining pendants first, then set beam spacing around them.
- Color temperature and color rendering decide whether a stain looks like the sample you approved.
- When lights are already in, designing the beam layout around them is nearly always the cheapest good answer.
A beamed ceiling is a lighting problem disguised as a design decision. The moment you put a solid horizontal object between a light source and the floor, you have changed where light goes, where shadows fall and what the beams themselves look like. Get the two designed together and the ceiling looks intentional from every angle. Get them designed separately and you get the defect we see more than any other: downlights clipped by beam edges, fixtures a few inches off center in every bay, and hard shadows raking across every beam face.
This guide covers what to decide, in what order, and what to hand an electrician.
Why the two cannot be designed separately
Ceiling lighting is normally laid out as a grid across an empty plane, sized to deliver reasonably even light to the floor. Beams break that plane into bays, and each bay is now its own small room as far as light is concerned.
Three things change at once:
- Fixture positions become constrained. A downlight can no longer sit anywhere; it sits in a bay, and ideally in a consistent position within every bay.
- The beams themselves become lit objects. They have three visible faces, and how those faces are lit determines whether the beam reads as heavy and dark or as textured timber.
- Shadow becomes a design element whether you plan it or not.
Whichever is fixed first constrains the other. If the beams are the design intent, lay them out and put the lighting into the bays. If the lighting is already installed and cannot move, the beam layout has to accept it — and accepting it deliberately produces a much better result than discovering it on install day.
The three layers, applied to a beamed ceiling
Standard lighting design separates ambient, task and accent light. On a beamed ceiling each layer has a natural home.
Ambient
The general light level. On a beamed ceiling this usually comes from downlights in the bays, or from indirect light bounced off the ceiling between beams. The thing to avoid is relying on a single central fixture: with beams in the way, one source produces long shadows in every direction and leaves the far ends of the room dim.
Task
Light where work happens — a kitchen island, a desk, a reading chair. Task lighting is positioned by the furniture, not the ceiling, which means it is the layer most likely to fight the beam grid. Resolve it first: pendants over an island are a fixed point, and the beam layout should be drawn around them rather than the other way round.
Accent
The layer that beamed ceilings are unusually good at, and the one most often left out. Accent light on the beams themselves — grazing along a face to reveal texture, or uplight from above to separate the beam from the ceiling — is what makes a beamed ceiling look designed at night rather than simply dark.
Downlights: position in the bay, not on the beam
The default and usually correct approach is a downlight or a pair per bay, centered between the beams.
- Centering matters more than spacing. The eye reads a repeated relationship instantly. A fixture that is centered in every bay looks deliberate even if the bays vary; a fixture on a rigid grid that lands off-center in some bays looks like an error, every time.
- Keep clear of the beam edge. A downlight too close to a beam throws a bright wedge onto the beam side and leaves a hard shadow below it. Move it toward the middle of the bay.
- Beam angle changes everything. A narrow spot in a bay makes pools of light and heavy shadow between them. A wider flood fills the bay more evenly. On a beamed ceiling, wider is usually the friendlier choice.
- Do not cut into the beam. Decorative beams are hollow and not a housing. Where a fixture must sit in a beam's position, the mount goes into the joist or into dedicated blocking and the beam is cut around it — a normal detail that needs planning.
Lighting the beams themselves
Grazing
Placing a light source close to a surface and aiming it along the face, so texture casts its own small shadows. On a hand-hewn or resawn beam, grazing is what makes the texture visible — light hitting a textured beam straight on flattens it completely.
This is the single biggest difference between a beam that looks like real timber at night and one that looks like a dark stripe.
Uplight from the beam
A concealed strip on top of a beam washing the ceiling above it separates beam from ceiling and makes the whole plane feel higher. It works best where the beams stand proud enough to hide the strip and where the ceiling above is a light color.
Cove and coffer lighting
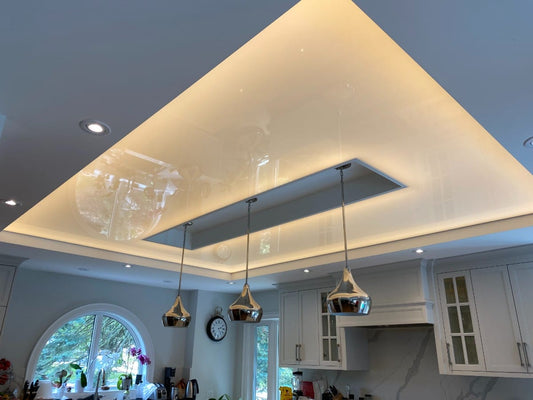
In a coffered ceiling or a tray, a concealed strip inside the recess lights the panel above and turns each coffer into a soft box of light. Two rules make the difference between elegant and disappointing: hide the source completely, because a visible strip of diodes destroys the effect from the far side of the room; and give the light room to spread, because a strip too close to the surface it lights produces scallops rather than a wash.
Linear fixtures alongside a beam
A linear pendant or surface fixture running parallel to a beam, offset slightly, reads as deliberate in a way a scattered downlight grid never does. Common in commercial work and increasingly in residential kitchens.
Pendants, chandeliers and the beam grid
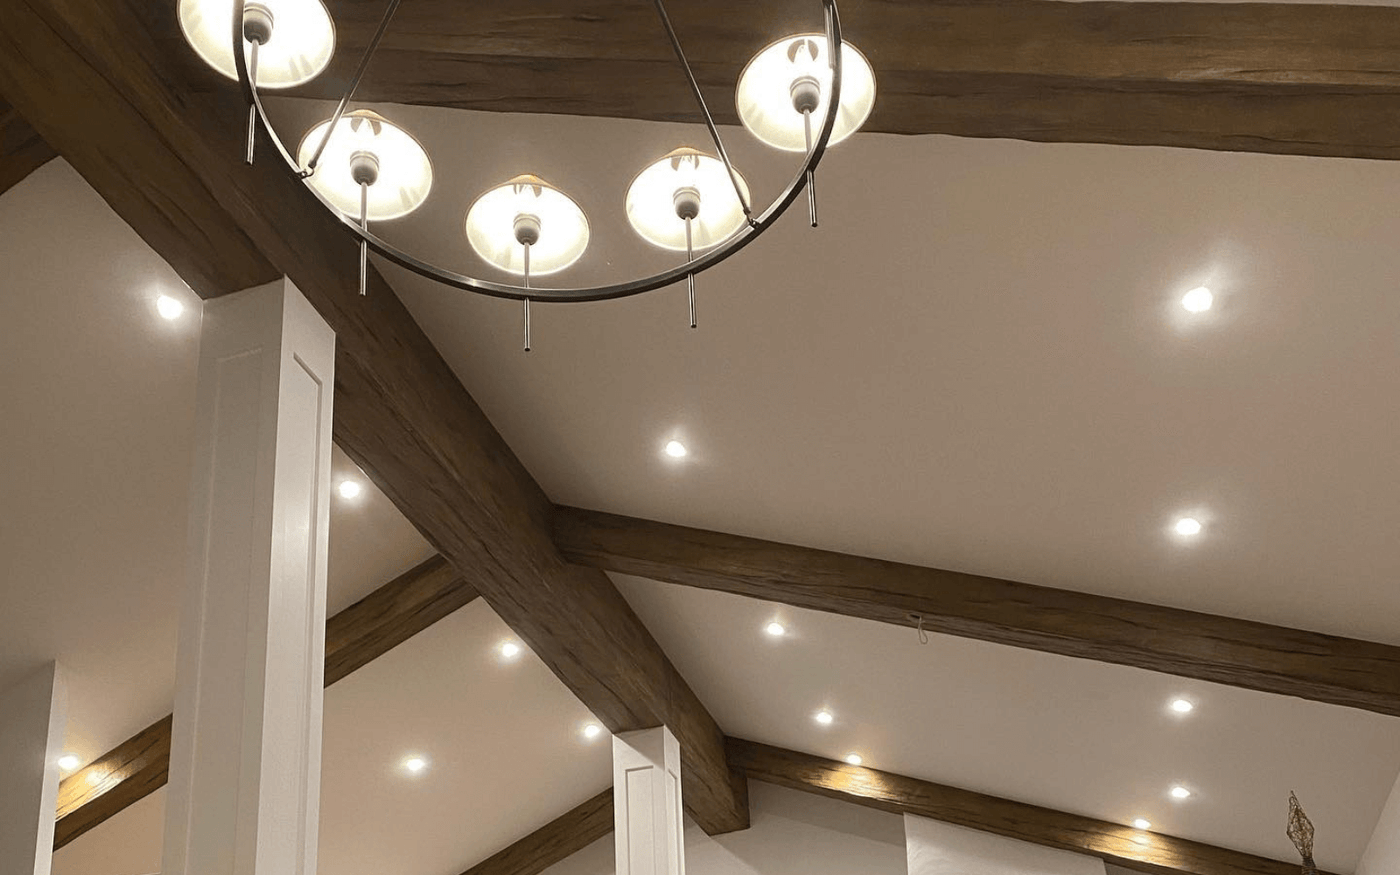
A pendant is a fixed point set by the furniture below it. Beams are a repeating grid. When those two disagree, the pendant wins — nobody moves a dining table to suit a beam.
So plan the fixed points first: the island, the dining table, the entry. Then set the beam spacing so those points fall sensibly — centered in a bay, or centered under a beam if the fixture hangs low enough that the beam is above the sight line.
The situation to avoid is a pendant hanging a few inches to one side of a beam. It reads as a mistake even to people who could not say why.
Color temperature and rendering
Two properties of the light source change how a stained beam looks, and both are chosen at specification.
- Color temperature. Warmer sources around 2700K bring out red and amber in a stain and suit living spaces. Around 3000K is a common compromise in kitchens and open plans. Neutral sources at 4000K and above make warm timber tones look grey and are rarely what anyone wants over a beamed residential ceiling. Whatever you choose, keep it consistent — mixed temperatures across one ceiling are visible and hard to unsee.
- Color rendering. The Color Rendering Index describes how faithfully a source shows color against a reference. Wood finishes are exactly the case where a low-CRI source disappoints: browns go flat and the difference between two stains disappears. Specifying a high-CRI source is one of the cheapest ways to make a finish look like what you chose.
This matters when matching a finish too. A stain approved under one light and installed under another will look like a different color. If you are color-matching to flooring or cabinetry, view the sample under the lighting the room will actually have — see beam textures and finishes.
Dimming and scenes
Beamed ceilings benefit disproportionately from dimming, because the beams are the part of the room that changes most between bright and low light. At full output, the ceiling is a lit plane with beams in it; dimmed, with accent light left up, the beams become the room's structure.
Practical points: put ambient, task and accent on separate circuits, or the layers cannot be balanced at all; confirm the driver and dimmer are compatible, because incompatible pairings flicker at the bottom of the range; and if you have several dimmable circuits, a couple of preset scenes are worth more than a wall of sliders nobody adjusts.
Vaulted ceilings
Vaults are the best rooms for beams and the hardest for lighting.
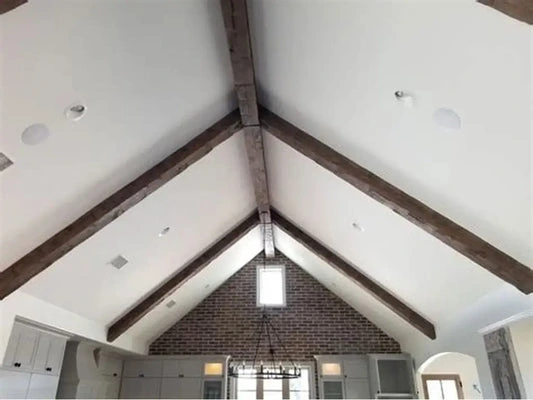
- Downlights in a sloped ceiling need to be designed for the slope, or they aim at the wall rather than the floor. Sloped-ceiling housings or adjustable trims exist for exactly this.
- Distance to the floor is much greater, so a fixture that works at eight feet is doing a different job at eighteen. Beam angle and output both need re-thinking rather than copying the flat-ceiling layout.
- The ridge is an opportunity. A concealed strip along a ridge beam washing both slopes is one of the most effective things you can do in a vaulted room, and it costs almost nothing once the beam is going in anyway.
- Access is a real constraint. Anything at the peak of a vault will need a lift to relamp. Long-life sources and reachable positions are worth more here than anywhere.
More on beam layout in these rooms in faux wood beams for vaulted ceilings.
When the lights are already in
Most retrofit projects. The lights are in, they work, and moving them means opening the ceiling.
Options in the order we usually suggest them:
- Design the beam layout around the existing fixtures. Set spacing so the lights fall centered in bays. This constrains the design, and it is nearly always the cheapest good answer.
- Move a few fixtures rather than all. Often two or three moves make an otherwise awkward layout work. Ask what the patching costs before dismissing it.
- Change the trims and lamps rather than the positions. Swapping narrow spots for wider floods, or a low-CRI lamp for a high-CRI one, changes how a beamed ceiling reads without touching the ceiling.
- Add accent light instead. Concealed strips on or beside beams often deliver more visual change than moving downlights, and involve no patching.
What to draw before anyone orders anything
One drawing, looking up at the ceiling, showing:
- The beam layout with dimensions to the walls.
- Every existing and proposed fixture, dimensioned from two walls.
- Which circuit each fixture is on.
- Fixed points that cannot move — the island, the table, a ceiling fan, a smoke detector.
- Joist direction, because it constrains where anything can be fixed.
On commercial work this is the reflected ceiling plan and it usually already exists — see coordinating a ceiling with HVAC, sprinklers and building services. On a house, a sketch with real dimensions does the job. What matters is that both grids appear on the same piece of paper before either is built.
Take that drawing to the electrician early. The questions that decide the outcome — can this fixture move, what is the beam angle, are these dimmable on separate circuits — are cheap to answer at that stage and expensive afterwards.
Getting it planned
If you are planning a beamed ceiling and the lighting is still open, that is the best position to be in. Send us your room dimensions, the ceiling height, where the fixed points are and what is already installed — how to measure your ceiling covers what to take — and we will lay the beams out against the lighting rather than despite it.
Send us the room, or see where we design and install.
Frequently Asked Questions
Should recessed lights go between beams or in them?
Between them, centered in the bay. Decorative beams are hollow and are not a fixture housing. Where a light must sit in a beam's position, the mount goes into the joist or dedicated blocking and the beam is cut around it.
How do I stop beams casting shadows across the ceiling?
Keep downlights toward the middle of each bay rather than near a beam edge, use a wider beam angle instead of narrow spots, and add light from more than one direction. A single central fixture on a beamed ceiling produces long shadows in every direction.
What color temperature works best with stained beams?
Warmer sources around 2700K bring out the red and amber in a stain; 3000K is a common compromise for kitchens and open plans. Neutral sources at 4000K and above make warm timber read grey. Keep one temperature across the whole ceiling — mixed temperatures are very visible.
What is grazing and why does it matter for beams?
Grazing places a source close to a surface and aims along it, so texture casts its own small shadows. It is the difference between a hand-hewn beam that looks like timber at night and one that reads as a dark stripe — light hitting texture straight on flattens it.
Can I add beams if the recessed lights are already installed?
Yes, and it is the most common case. Design the beam spacing so the existing fixtures fall centered in bays. If that produces an awkward layout, moving two or three fixtures often fixes it — ask what the patching costs before ruling it out.
Why does my beam finish look different from the sample?
Often the lighting rather than the finish. Color temperature and color rendering both change how a stain reads, and a low-CRI source flattens browns until two different stains look the same. Always view a sample under the lighting the room will actually have.
The right ceiling design can completely change the look and feel of your space while adding long-term style and value to your home or business.
Ready to transform your ceiling? You can contact Elite Ceiling Designs for a consultation and get a custom solution designed for your space and style.